

How To Use Barn Door Lighting
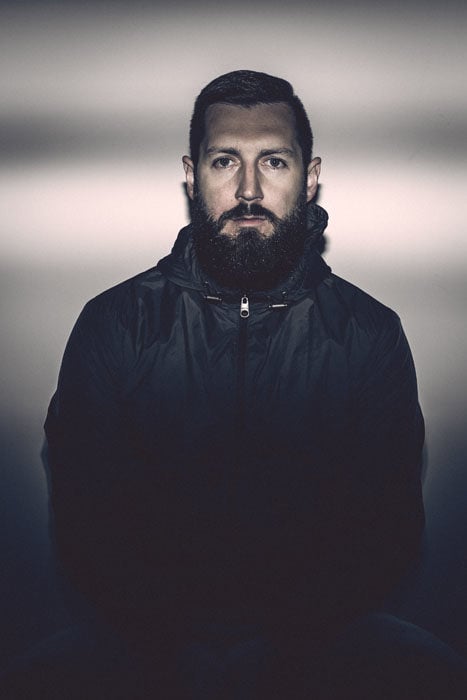
Recently, I had a portrait shoot with the legendary poet, rapper, and actor Saul Williams. It began with a elementary stroke of luck: I saw he was scheduled to perform at a local club nearly my house, and and so I did a quick search for the name of his managing director. I easily found information technology and e-mailed them, introducing myself and explained that I would like to take his portrait.
I said that I could meet him at the venue later on the sound check and would demand but 15 minutes. To my excitement, they agreed. His art had made quite an impact in my life, and then I really wanted to put a lot of thought into a concept for the shoot.
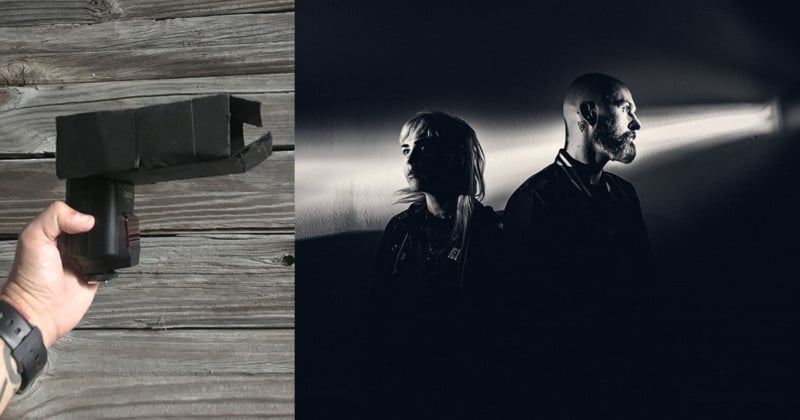
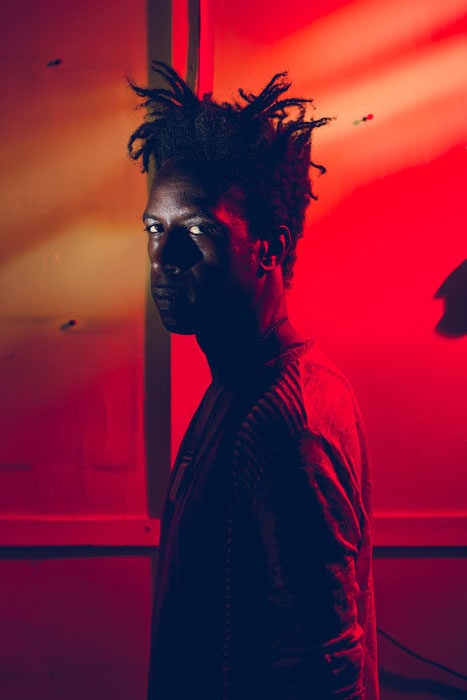
While revisiting his music, I had the idea that his vocalization, what he has to say, is a light in the darkness. This led me to the concept of putting Saul in a red scene, almost complete shadow, with a thin ray of pure white light illuminating his eyes. I didn't merely want a spot of light on him, just instead I wanted a thin line of light that ran across the wall and led through the frame to his face. This would require a light modifier that I didn't ain at the time; I would need barn doors for my flash.
Barn doors are metal flaps that tin can open and close, covering the left, right, top, and bottom of the low-cal. They are typically used on studio strobes or hot lights. It's the tool you need when you want to create a narrow line of light, either vertical or horizontal. The trouble is that they aren't available for small flashes. At least, they weren't at the local camera shop I went to hours before my shoot was scheduled to begin (I had finalized the concept for the shoot that morning).
Coming upwardly short at the camera shop, I decided to craft my ain barn doors.
I grabbed a canvas of black foam board, some black gaff tape and a utility pocketknife. I measured the width and height of the end of my flash and cut pieces of foam board to match it. After taping the 4 pieces together to make a tight-fitting box for the wink, I cut two boosted strips of foam board and taped them over the opening. These flaps were the barn doors.
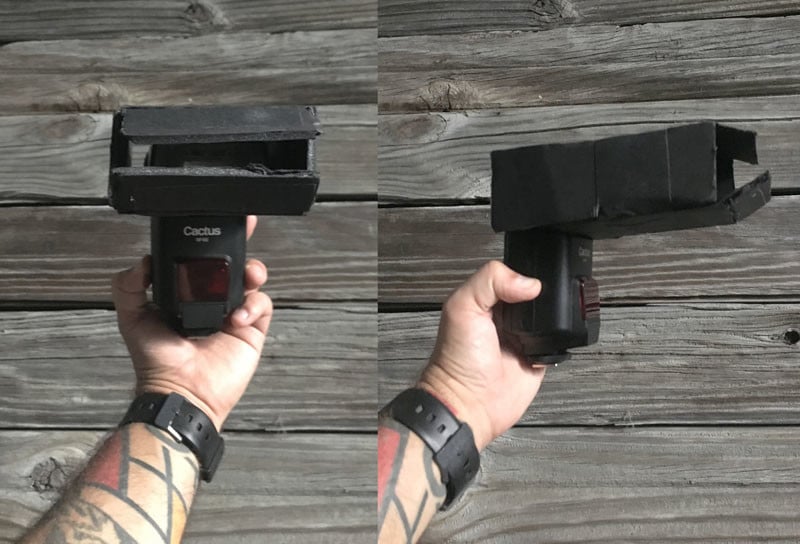
The gaff tape over the seams allowed them to hang open at a crude 45-degree bending. If I wanted an extremely small opening, I could pinch the flaps closed to the desired opening so hold them in positioning with a strip of tape.
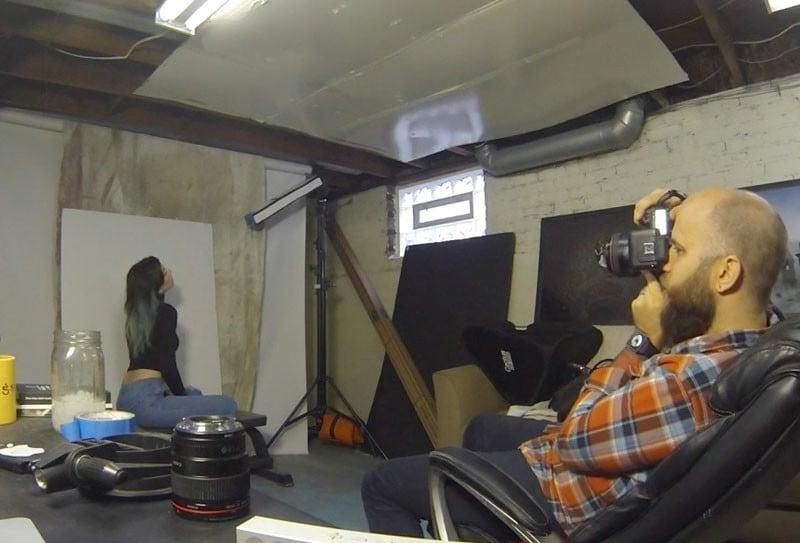
Equally you tin can see in the photograph above, the DIY barn doors worked like a charm. The best part about the modifier is that y'all tin blast it flat in your camera pocketbook, once it's removed from the flash because in that location is an opening on the front and back of it. It's the smallest, cheapest, and nearly effective calorie-free modifier that I own.
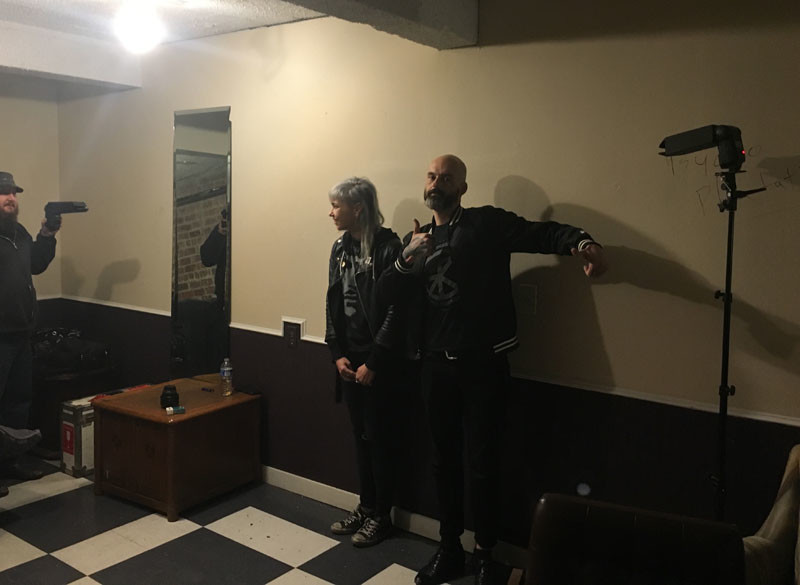
A calendar week after I was in New York City on a shoot and was staying in a hostel in Williamsburg. I had an actress day to exercise some test shooting, so I reached out to a few models. Two of the three models said that information technology'd be easier for them to come up to me. I explained that I was staying in a hostel and sharing a room with two roommates, so space would be extremely tight. They were fine with that.
I knew that with the especially cramped room and express wall infinite, I'd actually need to get creative with my lighting. Enter my newly crafted barn doors. As you can see, I literally had to prop my light on a coat hanger and identify my model by the door in order to have a blank wall space behind her.
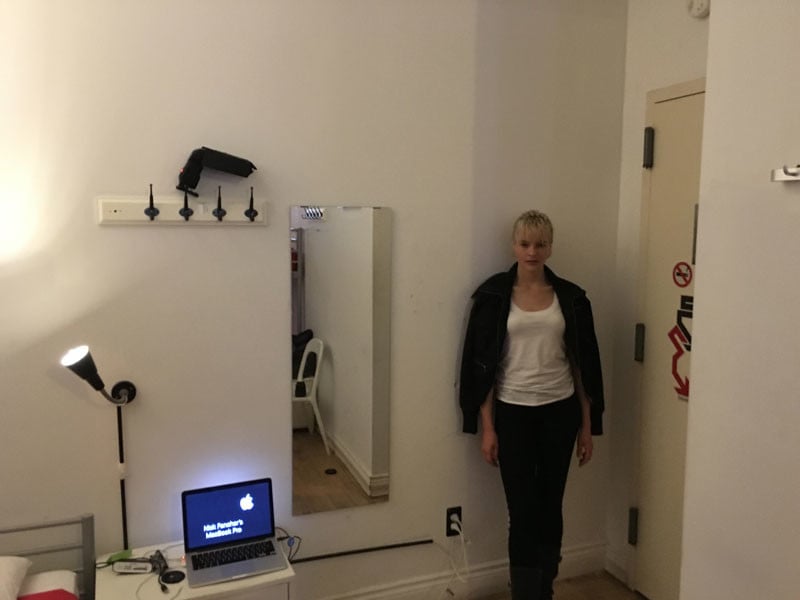
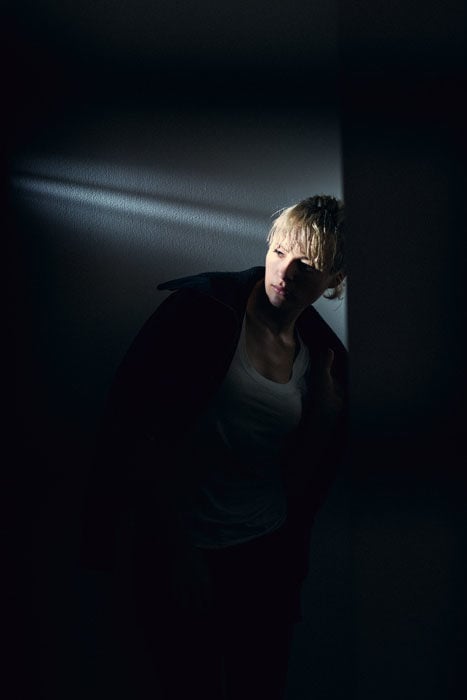
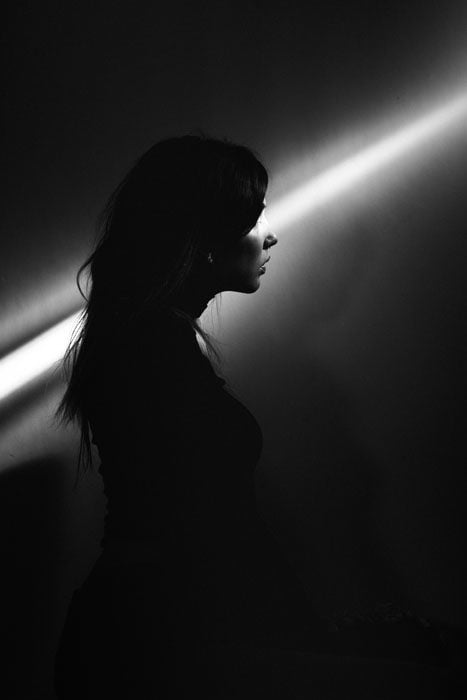
With the flash's close proximity to the wall and the improver of the befouled doors, a cool, unplanned thing happened — lasers.
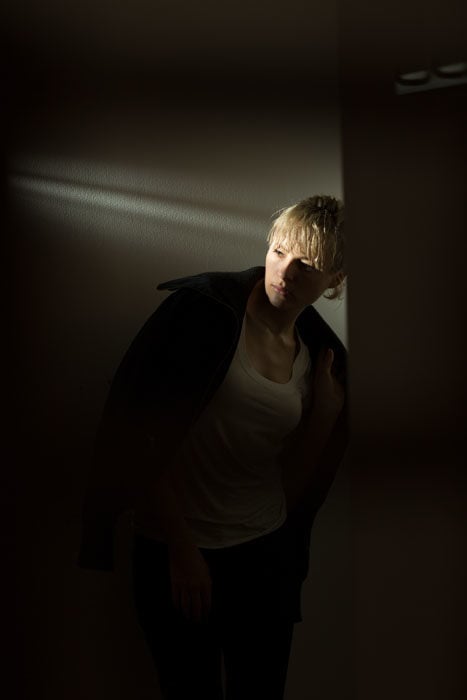
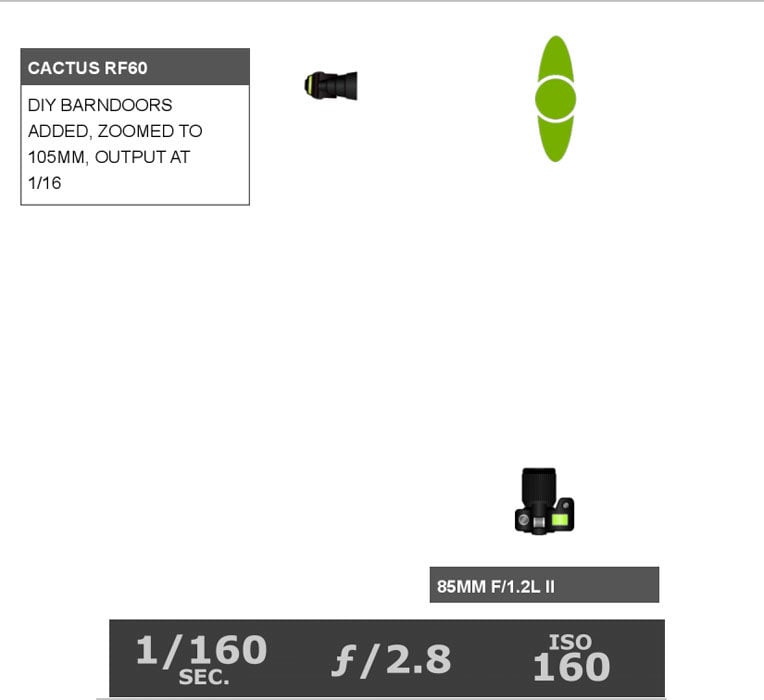
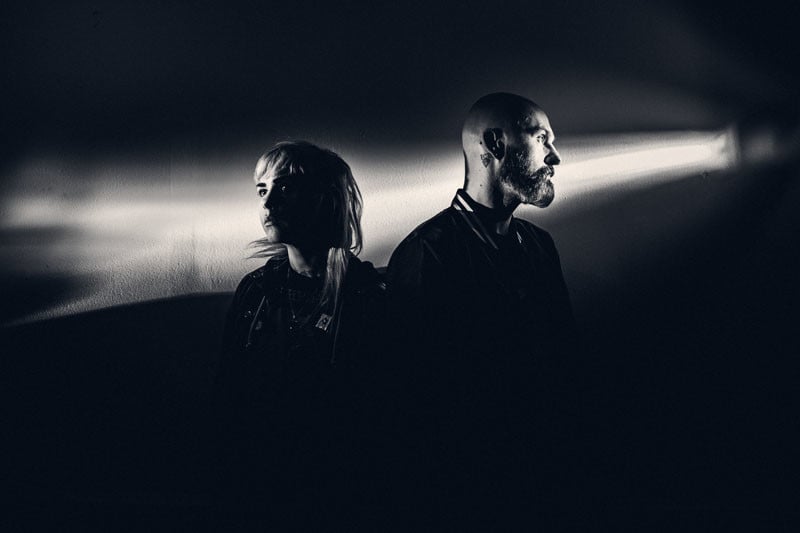
As I mentioned earlier, the Cactus flashes make a absurd, prism-like upshot when fired along a surface. When I place the barn door modifier on the flash and fire it along a surface, the prism effect is even more than pronounced, condign laser-like in appearance. I wanted the wall behind the model to be a little out of focus, assuasive some separation between the model, so I shot at a slightly wider aperture of f/ii.8.
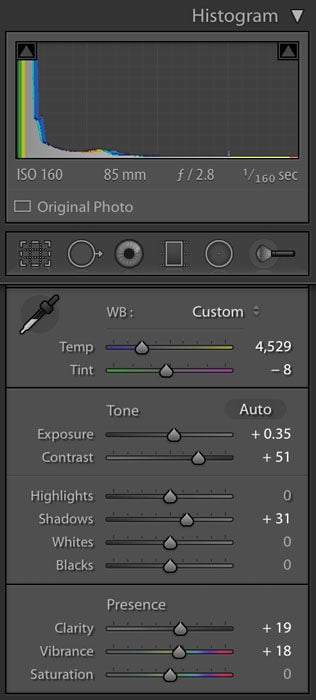
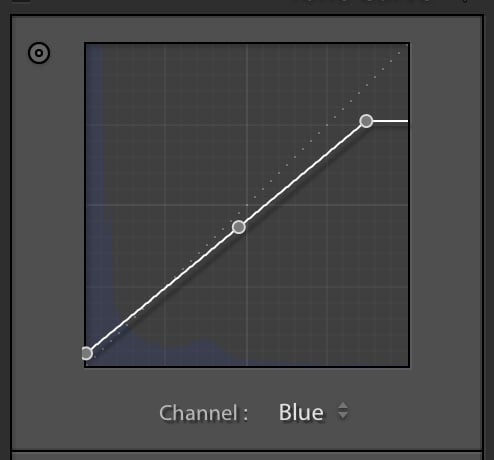
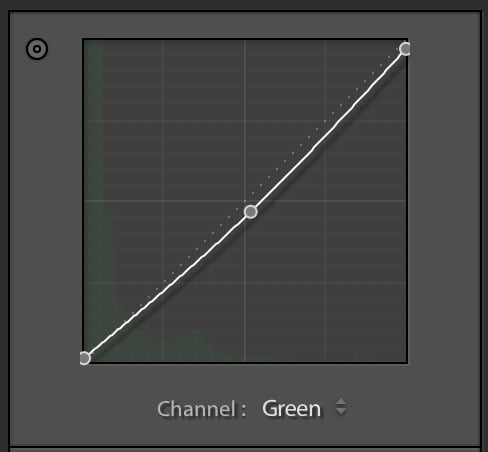
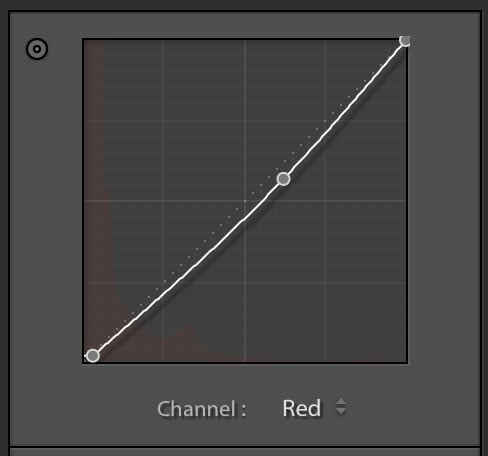
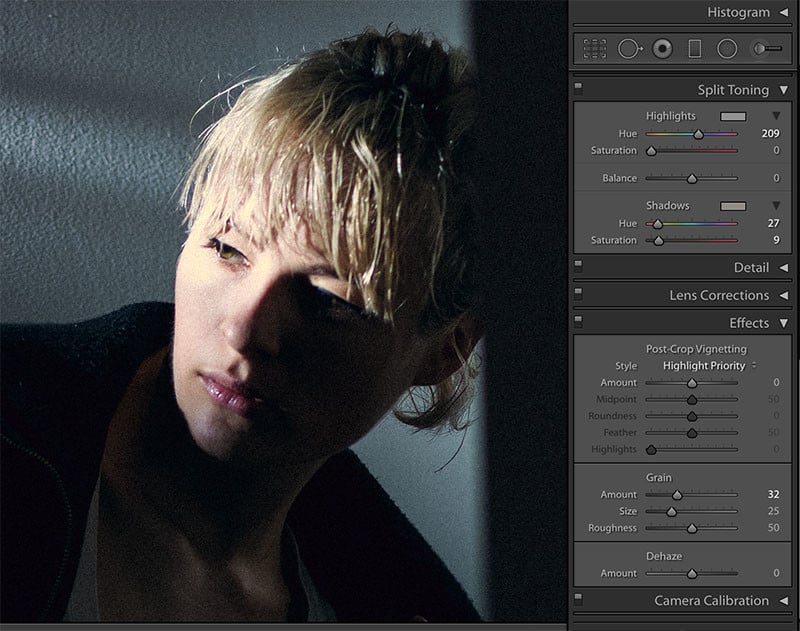
In Lightroom, aside from my normal color grading, I likewise wanted to add a bit of graininess to the image to requite the images a film noir vibe. This can be done in the Furnishings panel.
Experiment with the Amount, Size, and Roughness settings for the grain to find what you adopt. If you plan on whatever retouching to the prototype, exercise it before adding grain or the retoucher will hate you.
In the final shot, the tiny hostel room is no more than. It'due south just Larissa, alone in the void.
When I was photographing the Los Angeles industrial two-slice, Youth Code, I wanted to employ this lighting event. However, because the low-cal is so narrow when lit from the side, information technology wouldn't work to light both musicians evenly. Instead, I used two strobes, each outfitted with barn doors.
The barn doors were open up a bit more this time, assuasive the lite stream to exist a scrap wider.
You lot can still apply the barn doors to create a narrow, linear lighting consequence when photographing a group of people. When I photographed the metallic band Deafheaven, I wanted to accept them isolated against a seamless white, with their bodies silhouetted and only their faces illuminated. I met them at the venue at the fourth dimension of their sound check and I prepare a white seamless sweep.
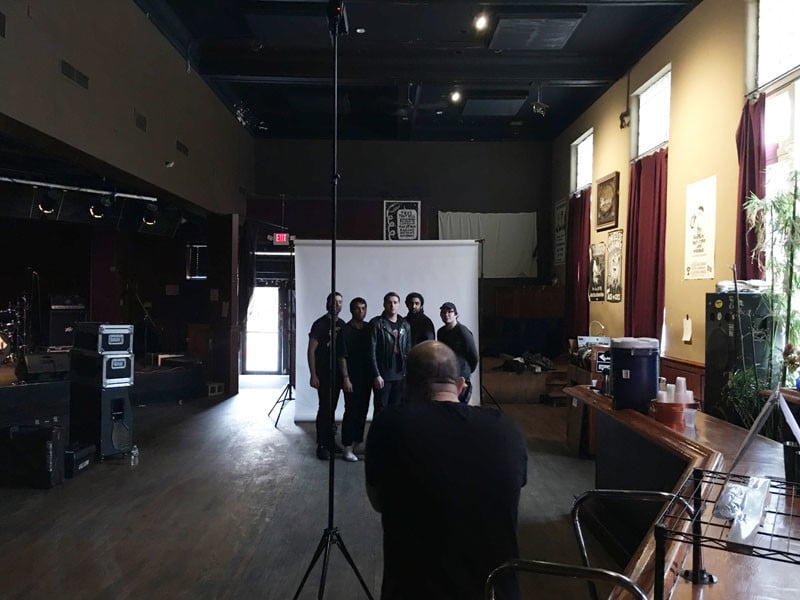
I would've preferred to just use a white wall every bit a backdrop, merely this club, similar well-nigh clubs, didn't take open, white walls. Thankfully, I brought a portable backdrop kit and a coil of white seamless with me just in example.
After setting up the sweep, I placed two flashes on the ground most 5 to 7 anxiety in front of it, at either end. I aimed them up at a 45-caste angle to get an even spread of light across the white. I laid downward a strip of black gaff tape merely in front of the groundwork lights, indicating where the band would stand up. I placed my chief light, with DIY barn doors fastened, about 15 feet in front of the tape line and raised it up to fifteen feet.
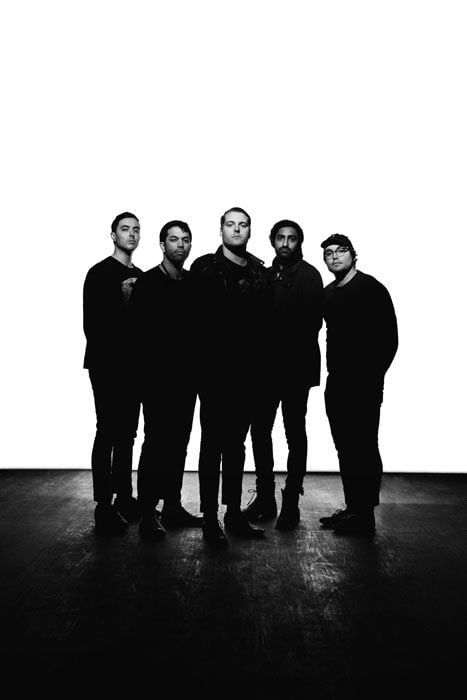
I needed the greater distance to allow the strip of light to be wide enough to cover all five ring members. Had it been closer, the guys at each cease of the group would've been in shadow. By raising the light to a high angle, the low-cal falling on them was making more dramatic light than it would've at a direct-on bending. In the last shot, you can't even run across the groundwork lights considering they were backside the legs of the subjects—another bonus of using pocket-sized flashes.
In the photo beneath, you tin see that I am using a bootleg snoot that is especially long—two feet long, in fact. I also placed a cookie (an object that is placed in forepart of a light source in order to change its shape or quality) over the opening, leaving merely a narrow, horizontal opening for light to escape.
The added length of the snoot shapes the low-cal into a narrower, more even and defined line than the shorter barn door snoot, equally the cookie is further away from the flash. The closer the barn doors, cookie, or lite modifier is to the flash, the softer the edges of the light output will be.
Finally, you can even become a great effect by placing the barn doors on your flash, while it's on your camera's hot shoe. The horizontal banding creates a cool, dramatic effect.
If you enjoyed this post, bank check out Studio Anywhere 2, a new book that guides photographers in the art of shaping light using minimal gear.
About the author: Nick Fancher is a Columbus, Ohio-based portrait and commerce photographer. You can connect with him on Facebook hither. You can besides find more than of his piece of work and writing on his website and Instagram.

How To Use Barn Door Lighting,
Source: https://petapixel.com/2016/08/08/shoot-pro-portraits-diy-barn-doors/
Posted by: washingtontured1978.blogspot.com
0 Response to "How To Use Barn Door Lighting"
Post a Comment