

1 2 Emt Take Up
How To Curve Conduit & Pipe with a Bender
Bending conduit can be frustrating without the proper materials. But by using a piping and conduit bender, even the well-nigh problematic angles can be made elementary; plus you eliminate the demand for costly conduit elbows when you brand your ain bends.
Tools & Supplies Y'all Need
When forming conduit, y'all need:
-
Level
-
Writing utensil
-
Tape measure
-
Conduit
-
Bender (The bough needs to be the right size in relation to the diameter of the pipes used—generally 3/4 or one/2 inch, though other sizes are available.)
When you use a bender with indicators and caste markers - like the ones from Klein Tools or Rack-a-Tiers - making a 30, 60, or 90 caste bend is simple. When making off-gear up, back-to-back, stub-ups or saddle bends, using a bender with a degree scale and multiplier scale helps salve y'all time and energy.
Making 90 Degree ("Fifty") Stub Upwards Bends
-
Determine the overall free finish meridian you desire once the curve is made
-
Summate the stub height by using the gratis end tiptop and subtract the stub adjustment (from Bough Accept Upward Tabular array below)

90 Caste STUB UP Bend - TAKE UP TABLE
CONDUIT SIZE STUB Adjustment 1/2" EMT 5" 3/four" EMT 6" 1" EMT 8" 1-1/4" EMT 11" 1/2" RIGID 6" three/4" RIGID 8" 1" RIGID 11" -
Mark the stub height that y'all calculated in pace 2 from the "upwardly" costless terminate of the conduit.

Instance: ½" EMT Conduit with Free Finish Superlative of x"
10 (free end pinnacle) – 5 (aligning from table) = 5" (stub height)
-
Place the conduit on the basis, and so attach the bender with the claw pointed toward the "up" gratuitous end. Line up the start betoken symbol on the bender (often an arrow) with the line you made in step 3.

-
Employ pressure level to the heel end of the bough with your foot, using the handle equally a lever, until you achieve the 90 degree position.

-
Remove the conduit from the bender and cheque the bending. Overbending may be necessary if you lot go a slight spring-back when yous take your foot off the bough.
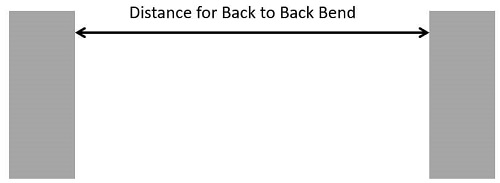
Making Back to Back Bends
-
Mensurate the distance between the objects (often walls or joists) where the dorsum to back bend will need to fit.
-
For the first bend, follow the ninety Degree Stub Upwards bend direction from above.
-
Starting from the Back of the bend, measure the distance calculated in pace 1 and mark the conduit.

-
Place the bender on the conduit facing the free stop that is opposite the original bend you fabricated in step 2. Line up the mark from footstep 3 with the start point symbol on the bender.

-
Use force per unit area to the heel terminate of the bender with your foot, using the handle as a lever, until yous achieve the ninety caste position. Be sure to proceed the new curve on the aforementioned obviously as the original bend to continue the two legs in the desired shape. Simply minimal adjustments can be fabricated to become the legs back on the same plane.

-
Remove the conduit from the bender and check the angles. Overbending may be necessary if you become a slight spring-back when you accept your foot off the bender.
Making Starting time Bends
-
Measure out the height needed to articulate the obstacle and distance needed to clear the obstacle.

-
Determine the angle y'all will need to fit your installation, then use the Kickoff Formula Table (beneath) to calculate where to marker your conduit.
OFFSET FORMULA TABLE ANGLE OF BEND CONSTANTS MULTIPLIER Shrink per INCH of Offset 10º x 10º half dozen ane/xvi = .063 22-1/2º x 22-1/2º 2.6 3/16 = .188 30º ten 30º ii.0 1/4 = .250 45º ten 15º i.four 3/8 = .375 60º x 60º one.2 ane/2 = .500 -
Summate where to place your get-go mark on the conduit using these formulas:
(Offset Distance) X (Shrink/Inch) = Total Shrink (Total Shrink) + (Distance to Obstacle) = Starting time Mark Measurement
Example: 45 bend, get-go altitude of obstacle is five", distance to obstacle is 16", five (Offset Altitude) X .375 (Compress/Inch) = 1.875 1. 875 (Total Compress) + 16 (Altitude to Obstacle) = 17.875 (First Mark)
-
Calculate how far to place your 2d mark from the kickoff mark using this formula:
(Offset Distance) Ten (Constance Multiplier) = Second Mark Measurement
Case: 45 degree bend, offset distance of obstacle is 5", distance to obstacle is 16" five (Offset Distance) 10 i.4 (Constance Multiplier) = seven (2nd Mark)

-
Place the bender on the conduit and line upwards the commencement signal symbol with the showtime mark on the conduit.
-
Proceed the conduit flat, using pes pressure to roll up the conduit to the 45 degree angle mark on the bender.

-
Flip the bender and conduit (keep them together) until the bender'due south handle is on the floor and the conduit is counterbalanced in the air.
-
Rotate the conduit 180 degrees in the bender cradle and slide the conduit to line up the bender's start indicate symbol with your second mark.

-
Reinforce the handle on the basis so information technology won't slip, and then utilize forcefulness to the conduit for an air bend. Be sure to keep the 2d bend in the same plane equally the first bend and so the conduit can lay flat when installed.
Angle Tips
- You can either calculate the markings using a tape measure or you lot can lay the conduit directly in the appropriated area and mark the measurements based on the physical construction itself.
- Make measurements using the back of the curve equally the starting indicate and practise secondary measurements from that point.
- Make certain to keep your pipe from rolling or slipping while in the bender.
- Symbols on the bender are used to point the outset and dorsum of the bend. Depending on the type of bend you are completing, you need to align the curve with the correct symbol and match the top of the pipe with the correct degree marking.
- A bender uses your foot force per unit area to brand the bend. While angle, apply steady, firm pressure level to the foot agree to ensure the bend stays true.
- If the bend in your pipe is not at the correct angle, only place information technology back in the bender and adjust the curve. When your measurements are all correct, the conduit will fit securely in the space in which information technology is to exist installed.
- Equally e'er, wear protective gear to prevent injury.
Exercise Makes Perfect
It may take some practice before you are able to curve conduit without having to fix the degree. Make sure your initial measurements are correct. If you need to, mensurate twice; that fashion you won't have too many chip pieces in the cease due to incorrect calculations. When you are first learning how to bend conduit, information technology's a slow and steady process. So accept your time, this is not meant to be a rush job.
Contact us for more data regarding handheld bending tools from Klein and Rack-A-Tiers.
Other Articles You Might Relish:
How to Calculate a Bend
Choosing the Right Pipe for Underground Utility Applications

1 2 Emt Take Up,
Source: https://shop.chapmanelectric.com/resources/how-to-bend-conduit
Posted by: washingtontured1978.blogspot.com
0 Response to "1 2 Emt Take Up"
Post a Comment